216.73.216.182 - United States, La Habra
laptop

How to setup OpenVPN on Windows 10

Following this step-by-step guide you can easily setup a VPN-connection by OpenVPN protocol on a Windows 10 operating system.

1
Download the latest version of OpenVPN Connect from the official site openvpn.net. Run the program installer.
Next
Setting up OpenVPN on Windows 10, step 1 Setting up OpenVPN on Windows 10, step 1
2
Click Yes to allow installation.
Next
Setting up OpenVPN on Windows 10, step 2 Setting up OpenVPN on Windows 10, step 2
3
Extract files with the 
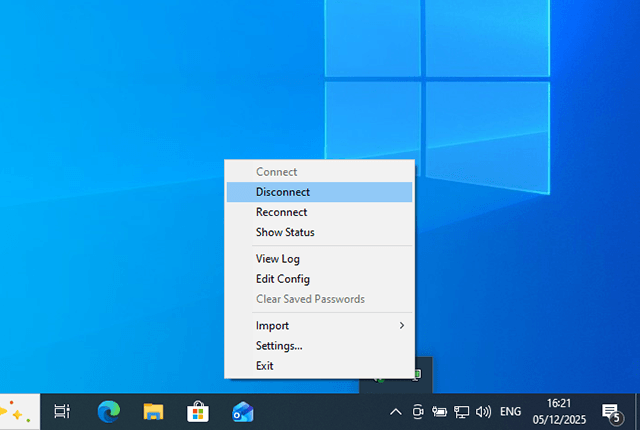
.ovpn extension from the archive received by mail when purchasing a subscription or downloaded from your personal area. Right-click on the icon of the OpenVPN client in the system tray, select Import -> Import file... and point to the saved .ovpn files.
Next
Setting up OpenVPN on Windows 10, step 3 Setting up OpenVPN on Windows 10, step 3
4
Right-click on OpenVPN icon from System tray, go to desired server and select Connect.
Next
Setting up OpenVPN on Windows 10, step 4 Setting up OpenVPN on Windows 10, step 4
5
The connection log will be displayed. After a successful connection, an OpenVPN icon will become green.
Next
Setting up OpenVPN on Windows 10, step 5 Setting up OpenVPN on Windows 10, step 5
6
To setup the outgoing IP open the http://setup.securevpnconnect.net when VPN-connection is active. Select the IP address you need and click the green check mark. The address is changed instantly, and the next time you connect to the VPN, the previously set address will be used.
Next
Setting up OpenVPN on Windows 10, step 6 Setting up OpenVPN on Windows 10, step 6
7
To break VPN-connection right-click on OpenVPN icon, go to active server and select Disconnect.
To top
Setting up OpenVPN on Windows 10, step 7 Setting up OpenVPN on Windows 10, step 7

Registration


E-mail
Language
Password
Confirm Password

Support and Feedback